Spring Boot Web Application Example
Spring Boot helps you accelerate and facilitate application development. This article will cover some core configuration and examples how to get start building a simple web application with Spring Boot.
In previous article - Spring Boot Quick Start we generated one todo-list project using Spring Intitializr. We will continue to use this project. Let's take a look this project. First, we will examine pom.xml. The generated project relies on the Spring Boot Starter parent:
<parent>
    <groupId>org.springframework.boot</groupId>
    <artifactId>spring-boot-starter-parent</artifactId>
    <version>2.1.8.RELEASE</version>
    <relativePath/> <!-- lookup parent from repository -->
</parent>
The project generated with following dependencies (and later we add MySQL Connector):
<dependency>
    <groupId>org.springframework.boot</groupId>
    <artifactId>spring-boot-starter-data-jpa</artifactId>
</dependency>
<dependency>
    <groupId>org.springframework.boot</groupId>
    <artifactId>spring-boot-starter-security</artifactId>
</dependency>
<dependency>
    <groupId>org.springframework.boot</groupId>
    <artifactId>spring-boot-starter-web</artifactId>
</dependency>
<dependency>
    <groupId>org.projectlombok</groupId>
    <artifactId>lombok</artifactId>
    <scope>provided</scope>
</dependency>
<dependency>
    <groupId>mysql</groupId>
    <artifactId>mysql-connector-java</artifactId>
    <scope>runtime</scope>
</dependency>
I also add lombok dependency since we will need it later.
@SpringBootApplication
Let's check main class of todo-list application: TodoListApplication.java.
TodoListApplication.java
import org.springframework.boot.SpringApplication;
import org.springframework.boot.autoconfigure.SpringBootApplication;

@SpringBootApplication
public class TodoListApplication {

    public static void main(String[] args) {
        SpringApplication.run(TodoListApplication.class, args);
    }
}
We are using @SpringBootApplication as our primary application configuration class. That is, @SpringBootApplication = @SpringBootConfiguration + @EnableAutoConfiguration + @ComponentScan.
@Target(value = {ElementType.TYPE})
@Retention(value = RetentionPolicy.RUNTIME)
@Documented
@Inherited
@SpringBootConfiguration
@EnableAutoConfiguration
@ComponentScan(excludeFilters = {
    @ComponentScan.Filter(type = FilterType.CUSTOM, classes = {TypeExcludeFilter.class}),
    @ComponentScan.Filter(type = FilterType.CUSTOM, classes = {AutoConfigurationExcludeFilter.class})})
public @interface SpringBootApplication {
   ...
}
Where @SpringBootConfiguration = @Configuration
@Target(value = {ElementType.TYPE})
@Retention(value = RetentionPolicy.RUNTIME)
@Documented
@Configuration
public @interface SpringBootConfiguration {
}
- SpringBootApplication: Indicates a configuration class that declares one or more @Bean methods and also triggers auto-configuration and component scanning. This is a convenience annotation that is equivalent to declaring @Configuration, @EnableAutoConfiguration and @ComponentScan.
- SpringBootConfiguration: Indicates that a class provides Spring Boot application @Configuration. Can be used as an alternative to the Spring's standard @Configuration annotation so that configuration can be found automatically (for example in tests).
- EnableAutoConfiguration: Enable auto-configuration of the Spring Application Context, attempting to guess and configure beans that you are likely to need. Auto-configuration classes are usually applied based on your classpath and what beans you have defined. For example, if you have tomcat-embedded.jar on your classpath you are likely to want a TomcatServletWebServerFactory (unless you have defined your own ServletWebServerFactory bean).
- ComponentScan: Configures component scanning directives for use with @Configuration classes. Provides support parallel with Spring XML's <context:component-scan> element.
Create a Web Application
To create a web application, we must have spring-boot-starter-web dependency to our pom.xml:
<dependency>
    <groupId>org.springframework.boot</groupId>
    <artifactId>spring-boot-starter-web</artifactId>
</dependency>
This dependency allow us to either build webservice/REST application or create normal web application that serving HTML page. For first example, let's create simple REST controller:
ApiRestController.java
import java.time.LocalDateTime;
import java.time.format.DateTimeFormatter;
import java.time.format.FormatStyle;
import lombok.Getter;
import org.springframework.http.MediaType;
import org.springframework.web.bind.annotation.GetMapping;
import org.springframework.web.bind.annotation.RestController;

@RestController
public class ApiRestController {

    @Getter
    class JSONObject {

        private final String datetime;

        public JSONObject(String s) {
            this.datetime = s;
        }
    }

    @GetMapping(value = "/api/now", produces = MediaType.APPLICATION_JSON_VALUE)
    public JSONObject now() {
        return new JSONObject(DateTimeFormatter.ofLocalizedDateTime(FormatStyle.SHORT).format(LocalDateTime.now()));
    }
}
The class is flagged as a @RestController, which combines @Controller and @ResponseBody, two annotations that results in web requests returning data rather than a view. @GetMapping maps /api/now to the now() method. When invoked from a browser or using curl on the command line, the method return a JSON object. For simplicity, I just put JSONObject as inner class.
Our second example is a simple web application serving normal HTML page:
TimeController.java
import java.time.LocalDateTime;
import java.time.format.DateTimeFormatter;
import java.time.format.FormatStyle;
import org.springframework.stereotype.Controller;
import org.springframework.web.bind.annotation.GetMapping;
import org.springframework.web.bind.annotation.ResponseBody;

@Controller
public class TimeController {

    @GetMapping("/now")
    @ResponseBody
    public String now() {
        return "<strong>" + DateTimeFormatter.ofLocalizedDateTime(FormatStyle.SHORT).format(LocalDateTime.now()) + "<strong>";
    }
}
Here the result when invoked from a browser:
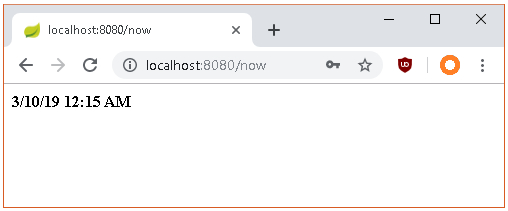
http://localhost:8080/now
In view-source mode:
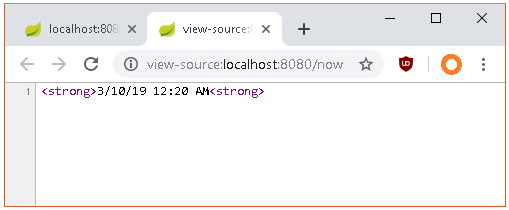
view-source:http://localhost:8080/now
Yes, it's serving HTML. But we need more proper dependency to help us serving full blown HTML.
Build Simple MVC Using Thymeleaf
Thymeleaf is a modern server-side Java template engine for both web and standalone environments. Add spring-boot-starter-thymeleaf dependency to our pom.xml:
<dependency>
    <groupId>org.springframework.boot</groupId>
    <artifactId>spring-boot-starter-thymeleaf</artifactId>
</dependency>
Let's create a basic home page by creating a simple controller (IndexController.java) and one html file (index.html):
IndexController.java
import java.time.LocalDateTime;
import java.time.format.DateTimeFormatter;
import java.time.format.FormatStyle;
import org.springframework.stereotype.Controller;
import org.springframework.ui.Model;
import org.springframework.web.bind.annotation.GetMapping;

@Controller
public class IndexController {

    @GetMapping("/")
    public String homePage(Model model) {
        String dtNow = DateTimeFormatter.ofLocalizedDateTime(FormatStyle.SHORT).format(LocalDateTime.now());
        model.addAttribute("dtnow", dtNow);
        return "index";
    }
}
home.html
<!DOCTYPE html>
<html>
    <head>
        <title>Todo List Index Page</title>
        <meta charset="UTF-8">
        <meta name="viewport" content="width=device-width, initial-scale=1.0">
    </head>
    <body>
        <h1>Welcome to Todo List - Spring Boot Application</h1>
        <div>Date/Time now: <span th:text="${dtnow}"/></div>
    </body>
</html>
When navigate to in browser, we get the following result:
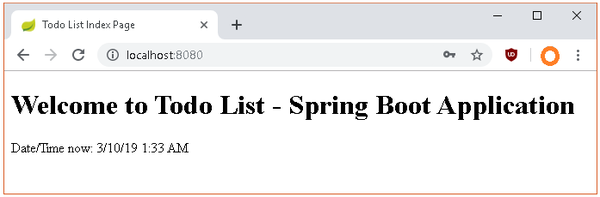
http://localhost:8080/
As you can see, adding spring-boot-starter-thymeleaf enable Thymeleaf by default, without any (extra) configuration. Just remember to deposit html file to /src/main/resources/templates.
But, there is one thing that I skip until now. When we try to access now() api, as example via curl, we encounter following error:
$ curl http://localhost:8080/api/now
{"timestamp":"2019-10-02T16:12:17.512+0000","status":401,"error":"Unauthorized","message":"Unauthorized","path":"/api/now"}
Or if using browser we will redirected to login page:
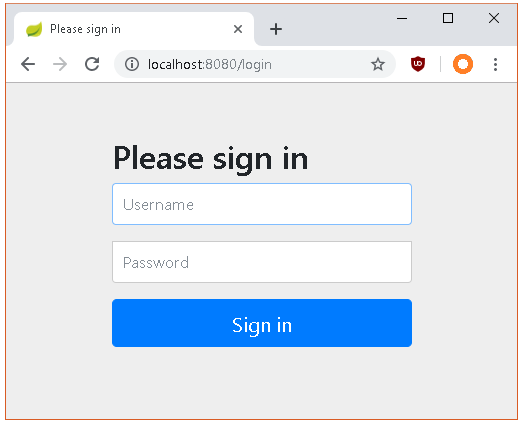
http://localhost:8080/login
This is because we enabled Spring security.
Configuring Security
Here the dependency for Spring Security in Spring Boot:
<dependency>
    <groupId>org.springframework.boot</groupId>
    <artifactId>spring-boot-starter-security</artifactId>
</dependency>
Once the spring-boot-starter-security dependency added, all endpoints are secured by default. That's why we got either error 401 Unauthorized or ask for credentials (redirecting to login page). The password changes for each application restarts and can be found in console:
Using generated security password: 68be5afb-814e-4ba4-a481-03db20ef823c
Sure we can add our own layer of application security:
import org.springframework.context.annotation.Configuration;
import org.springframework.security.config.annotation.authentication.builders.AuthenticationManagerBuilder;
import org.springframework.security.config.annotation.web.configuration.EnableWebSecurity;
import org.springframework.security.config.annotation.web.configuration.WebSecurityConfigurerAdapter;

@Configuration
@EnableWebSecurity
public class WebSecurityConfig extends WebSecurityConfigurerAdapter {

    @Override
    protected void configure(AuthenticationManagerBuilder auth) throws Exception {
        auth.inMemoryAuthentication()
                .withUser("barista").password("{noop}espresso").roles("USER");
    }
}
or if you just want to change user and password you could add (override) in application.properties:
spring.security.user.name=barista
spring.security.user.password=espresso
And here the result when curl with credential given:
$ curl localhost:8080/ -u barista:espresso
<!DOCTYPE html>
<html>
    <head>
        <title>Todo List Index Page</title>
        <meta charset="UTF-8">
        <meta name="viewport" content="width=device-width, initial-scale=1.0">
    </head>
    <body>
        <h1>Welcome to Todo List - Spring Boot Application</h1>
        <div>Date/Time now: <span>4/10/19 12:16 AM</span></div>
    </body>
</html>
We also able to define our own custom Security configuration by extending the WebSecurityConfigurerAdapter class:
WebSecurityConfig.java
import org.springframework.context.annotation.Configuration;
import org.springframework.http.HttpMethod;
import org.springframework.security.config.annotation.web.builders.HttpSecurity;
import org.springframework.security.config.annotation.web.configuration.EnableWebSecurity;
import org.springframework.security.config.annotation.web.configuration.WebSecurityConfigurerAdapter;

@Configuration
@EnableWebSecurity
public class WebSecurityConfig extends WebSecurityConfigurerAdapter {

    @Override
    protected void configure(HttpSecurity httpSecurity) throws Exception {
        httpSecurity.authorizeRequests()
           .mvcMatchers(HttpMethod.GET, "/api/**", "/now", "/").permitAll()
        .anyRequest().denyAll();
    }
}
permitAll() will allow those uri without the needs of providing credential.
Persistence
In this example, we are using Spring Data JPA
<dependency>
    <groupId>org.springframework.boot</groupId>
    <artifactId>spring-boot-starter-data-jpa</artifactId>
</dependency>
Let's create a simple data model - Todo entity
Todo.java
import java.io.Serializable;
import java.util.Date;
import javax.persistence.Basic;
import javax.persistence.Column;
import javax.persistence.Entity;
import javax.persistence.FetchType;
import javax.persistence.GeneratedValue;
import javax.persistence.Id;
import javax.persistence.Table;
import lombok.Getter;
import lombok.Setter;
import org.hibernate.annotations.Cache;
import org.hibernate.annotations.CacheConcurrencyStrategy;
import org.hibernate.annotations.GenericGenerator;

@Entity
@Table(name = "todo")
@Cache(usage = CacheConcurrencyStrategy.READ_WRITE)
@Getter
@Setter
public class Todo implements Serializable, Comparable<Todo> {

    private static final long serialVersionUID = 4048798961366546485L;

    @Id
    @Column(name = "id")
    @GeneratedValue(generator = "system-uuid")
    @GenericGenerator(name = "system-uuid", strategy = "uuid")
    private String todoId;

    private Date creationDate;

    private String description;

    private int priority;

    private boolean completed;

    private Date completionDate;

    private Date dueDate;

    @Basic(fetch = FetchType.LAZY)
    @Column(length = 4000)
    private String notes;

    private boolean hasNotes;

    @Override
    public int compareTo(Todo that) {
        int order = that.getPriority() - this.getPriority();
        if (this.isCompleted()) {
            order += 10000;
        }
        if (that.isCompleted()) {
            order -= 10000;
        }
        if (order == 0) {
            order = (this.getDescription() + this.getTodoId()).compareTo(that
                    .getDescription()
                    + that.getTodoId());
        }
        return order;
    }

    @Override
    public boolean equals(Object o) {
        if (this == o) {
            return true;
        }
        if (o == null || getClass() != o.getClass()) {
            return false;
        }

        Todo todo = (Todo) o;

        return !(todoId != null ? !todoId.equals(todo.todoId) : todo.todoId != null);
    }

    @Override
    public int hashCode() {
        return todoId != null ? todoId.hashCode() : 0;
    }
}
Next is create a repository, we are will make use of CrudRepository, interface for generic CRUD operations on a repository for a specific type.
TodoRepository.java
package com.dariawan.todolist.repository;

import com.dariawan.todolist.domain.Todo;
import org.springframework.data.repository.CrudRepository;

public interface TodoRepository extends CrudRepository<Todo, Long> {

}
Then we need to EnableJpaRepositories in our application
import org.springframework.boot.SpringApplication;
import org.springframework.boot.autoconfigure.SpringBootApplication;
import org.springframework.data.jpa.repository.config.EnableJpaRepositories;

@SpringBootApplication
@EnableJpaRepositories("com.dariawan.todolist.repository")
public class TodoListApplication {

    public static void main(String[] args) {
        SpringApplication.run(TodoListApplication.class, args);
    }

}
@EnableJpaRepositories will enable scan the specified package for repositories. Let's complete this example by create a Service an a Controller:
TodoService.java
import com.dariawan.todolist.domain.Todo;
import com.dariawan.todolist.exception.ResourceNotFoundException;
import com.dariawan.todolist.repository.TodoRepository;
import java.util.ArrayList;
import java.util.List;
import org.springframework.beans.factory.annotation.Autowired;
import org.springframework.stereotype.Service;

@Service
public class TodoService {

    @Autowired
    private TodoRepository todoRepository;

    public Todo findById(Long id) throws ResourceNotFoundException {
        Todo todo = todoRepository.findById(id).orElse(null);
        if (todo==null) {
            throw new ResourceNotFoundException("Cannot find Todo with id: " + id);
        }
        else return todo;
    }

    public List<Todo> findAll() {
        List<Todo> todos = new ArrayList<>();
        todoRepository.findAll().forEach(todos::add);
        return todos;
    }
}
TodoRestController.java
import com.dariawan.todolist.domain.Todo;
import com.dariawan.todolist.service.TodoService;
import java.util.List;
import org.springframework.beans.factory.annotation.Autowired;
import org.springframework.http.MediaType;
import org.springframework.web.bind.annotation.GetMapping;
import org.springframework.web.bind.annotation.RestController;

@RestController
public class TodoRestController {

    @Autowired
    private TodoService todoService;

    @GetMapping(value = "/api/todos", produces = MediaType.APPLICATION_JSON_VALUE)
    public ResponseEntity<List<Todo>> findAll() {
        return ResponseEntity.ok(todoService.findAll());
    }
}
And when we run it (with todo data pre-populated), we will get something like this:
$ curl localhost:8080/api/todos
[{"todoId":"1","creationDate":"2019-09-30T17:16:38.000+0000","description":"Create Todo-list Application","priority":1,"completed":true,"completionDate":"2019-10-05T17:16:32.000+0000","dueDate":"2019-10-05T17:17:00.000+0000","notes":"Todo list application is created with Spring Boot","hasNotes":true},{"todoId":"2","creationDate":"2019-10-03T17:17:44.000+0000","description":"Explain Spring Boot auto configuration","priority":1,"completed":false,"completionDate":null,"dueDate":"2019-10-10T17:18:10.000+0000","notes":null,"hasNotes":false}]
Testing
We need to add tests for our application, and Spring Test already provides some machinery for that, and it’s easy to include in your project. If you are using Maven, this dependency should be in your dependencies:
<dependency>
    <groupId>org.springframework.boot</groupId>
    <artifactId>spring-boot-starter-test</artifactId>
    <scope>test</scope>
</dependency>
As an example, we will create a simple unit test that mocks the servlet request and response through your endpoint:
ApiRestControllerTest.java
import java.time.LocalDate;
import java.time.format.DateTimeFormatter;
import java.time.format.FormatStyle;
import static org.hamcrest.Matchers.containsString;
import org.junit.Test;
import org.junit.runner.RunWith;
import org.springframework.beans.factory.annotation.Autowired;
import org.springframework.boot.test.autoconfigure.web.servlet.AutoConfigureMockMvc;
import org.springframework.boot.test.context.SpringBootTest;
import org.springframework.http.MediaType;
import org.springframework.test.context.junit4.SpringRunner;
import org.springframework.test.web.servlet.MockMvc;
import org.springframework.test.web.servlet.request.MockMvcRequestBuilders;
import static org.springframework.test.web.servlet.result.MockMvcResultMatchers.content;
import static org.springframework.test.web.servlet.result.MockMvcResultMatchers.status;

@RunWith(SpringRunner.class)
@SpringBootTest
@AutoConfigureMockMvc
public class ApiRestControllerTest {

    @Autowired
    private MockMvc mvc;

    @Test
    public void getNow() throws Exception {
        String sdate = DateTimeFormatter.ofLocalizedDate(FormatStyle.SHORT).format(LocalDate.now());
        mvc.perform(MockMvcRequestBuilders.get("/api/now").accept(MediaType.APPLICATION_JSON))
                .andExpect(status().isOk())
                .andExpect(content().string((containsString(sdate))));
    }
}
The MockMvc allow us to send HTTP requests into the DispatcherServlet and make assertions about the result. In this approach, server start is not required at all. To enable MockMvc we are using another annotation called @AutoConfigureMockMvc.
Spring Boot also allow us to write a very simple full-stack integration test:
ApiRestControllerITest.java
import java.time.LocalDate;
import java.time.format.DateTimeFormatter;
import java.time.format.FormatStyle;
import static org.hamcrest.MatcherAssert.assertThat;
import static org.hamcrest.Matchers.containsString;
import org.junit.Test;
import org.junit.runner.RunWith;
import org.springframework.beans.factory.annotation.Autowired;
import org.springframework.boot.test.context.SpringBootTest;
import org.springframework.boot.test.web.client.TestRestTemplate;
import org.springframework.boot.web.server.LocalServerPort;
import org.springframework.http.ResponseEntity;
import org.springframework.test.context.junit4.SpringRunner;

@RunWith(SpringRunner.class)
@SpringBootTest(webEnvironment = SpringBootTest.WebEnvironment.RANDOM_PORT)
public class ApiRestControllerITest {

    @LocalServerPort
    private int port;

    @Autowired
    private TestRestTemplate template;

    private String createURLWithPort(String uri) {
        return "http://localhost:" + port + uri;
    }

    @Test
    public void getNow() throws Exception {
        String sdate = DateTimeFormatter.ofLocalizedDate(FormatStyle.SHORT).format(LocalDate.now());
        ResponseEntity<String> response = template.getForEntity(createURLWithPort("/api/now"),
                String.class);
        assertThat(response.getBody(), containsString(sdate));
    }
}
In the above code, we have used WebEnvironment.RANDOM_PORT to spin up the application on random port temporarily. @LocalServerPort helps to read the current port. Then we build the URL, use template class to test and get the response.
Summary
This was a quick introduction on how to get started with Spring Boot. This is only a simple example of what Spring Boot can do, build a foundation to create an enterprise grade production services.

Desson AriawanProgrammer